With cPanel's Softaculous App Installer, you have access to over 500+ applications ready to install in just a few clicks. Whether you need a Content Management System (CMS), eCommerce platform, blog, or forum, Softaculous makes it easy to set up and manage your favorite applications without technical knowledge.
Key Features of Softaculous App Installer:
-
One-Click Installation
You don’t need to manually download, upload, or configure anything. With just one click, Softaculous will install your chosen app automatically. -
500+ Applications Available
From popular CMS platforms like WordPress, Joomla, Drupal, and Magento to eCommerce tools, forums, wikis, and more—you can explore hundreds of apps for any purpose. -
Easy Management
Softaculous allows you to manage your apps directly through cPanel. You can install, update, back up, or remove applications effortlessly. -
Up-to-Date Versions
All applications are updated regularly to ensure you are using the latest, most secure versions. This helps keep your site safe and running smoothly. -
Variety of Categories
Softaculous offers apps for:- Content Management: WordPress, Joomla, pH7Builder, etc.
- eCommerce: Magento, PrestaShop, OpenCart, etc.
- Blogs: WordPress, Serendipity, b2evolution.
- Forums: phpBB, Simple Machines, MyBB.
- Wikis: DokuWiki, MediaWiki.
- Customer Support: osTicket, LiveChat.
-
No Technical Skills Required
Even if you are a beginner, Softaculous makes it simple. Just choose the app, enter a few details, and the installer will do the rest for you.
How to Install WordPress for Your Domain
Follow these simple steps to install WordPress for your domain using cPanel:
1. Log into cPanel
Log in to your hosting client area and navigate to the cPanel dashboard. Alternatively, you can use the cPanel login details sent to your registered email address to access the dashboard directly.
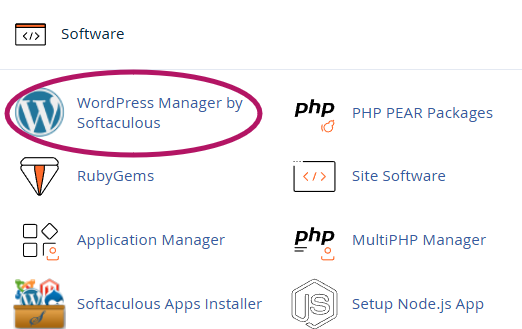
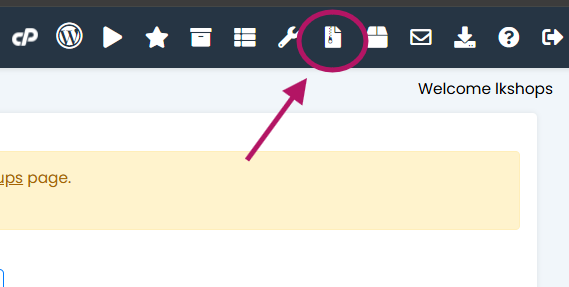
2. Find WordPress Manager by Softaculous
- On the left side of the cPanel dashboard, you will see the WordPress Manager by Softaculous.
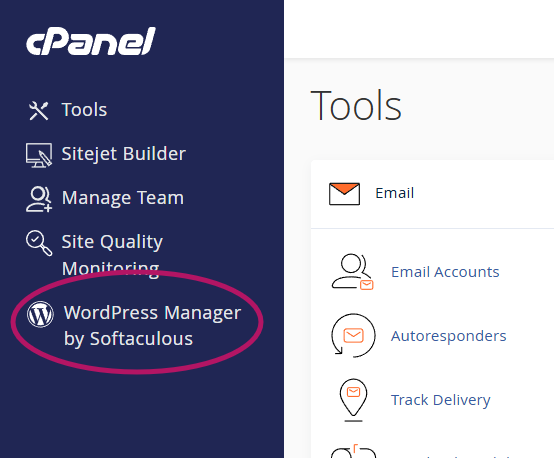
- If not, scroll down to the Software section in the cPanel dashboard to find it there.
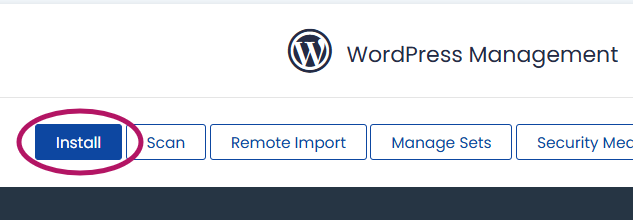
3. Start the Installation
Click on the Install button in the WordPress Manager.
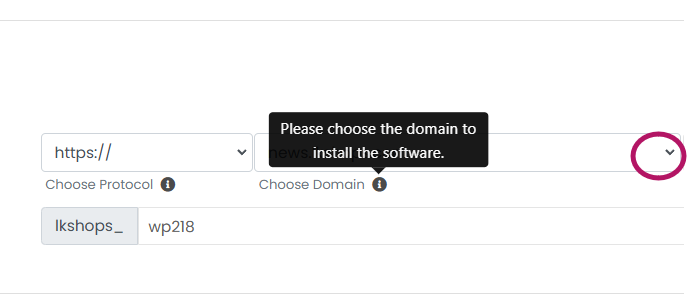
4. Select Domain and Protocol
- If you want your site to use www, select the option with www from the dropdown menu.
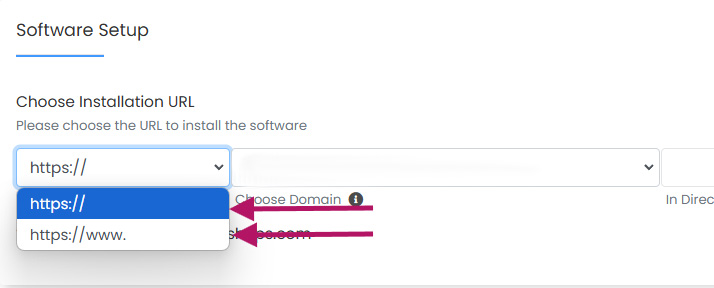
- Choose the domain where you want to install WordPress.

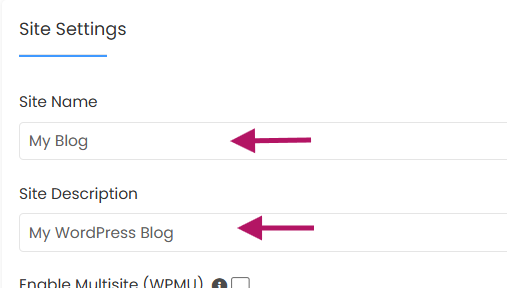
5. Set Up Site Settings
In the Site Settings section:
- Enter your Site Name.
- Add a short Description for your site.
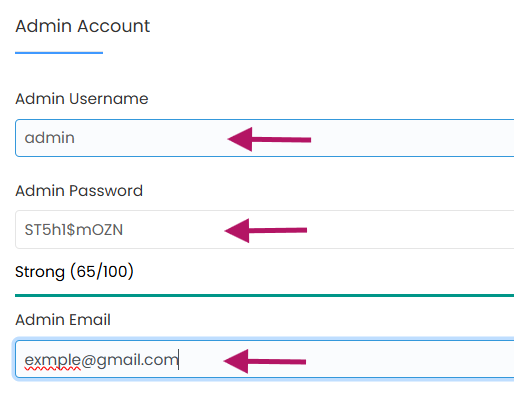
6. Set Admin Details
- Create an Admin Username.
- Set a Strong Password for the admin account.
- Enter an Admin Email Address for account recovery.
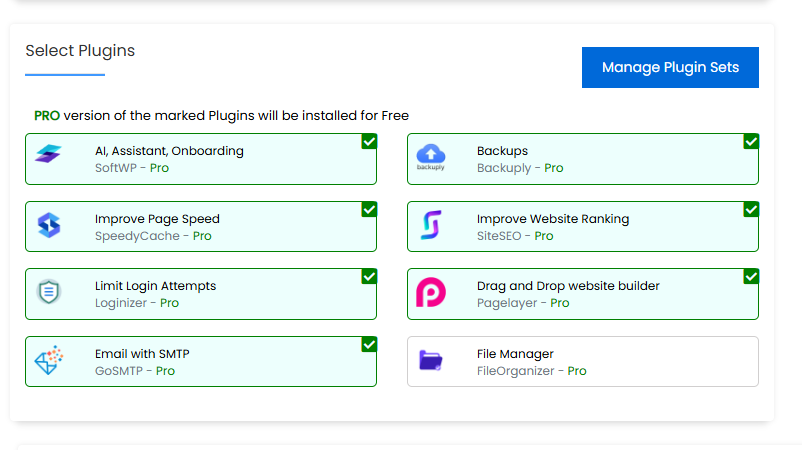
7. Remove unwanted plugins (If you don't need this plugins)
When installing a WordPress site, if any plugins are pre-selected, make sure to remove them by clicking on them. These plugins come with WordPress by default and may not be necessary for your site. However, there is no problem whether you install WordPress with or without these plugins included. But it is better to install without this plugins.
8. Install WordPress
Scroll to the bottom of the page and click on the Install button. WordPress will now be installed with the details you provided.

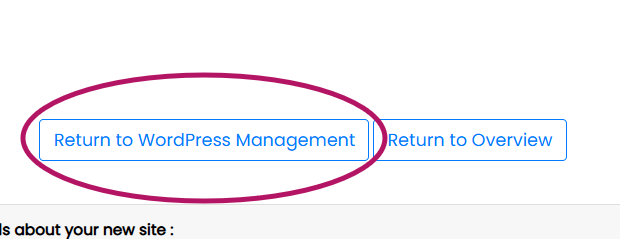
9. Return to WordPress Manager
After the installation is complete, click on Return to WordPress Manager. Here, you’ll see all the WordPress sites you’ve installed.
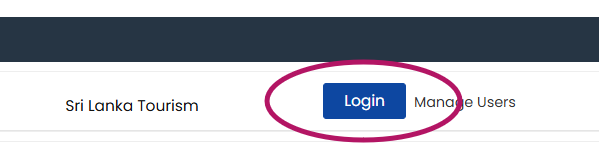
10. Log In to Your WordPress Dashboard
Click on the Login button next to your site. This will take you to your site’s WordPress dashboard, where you can manage and customize your website.
That's it! You’ve successfully installed WordPress for your domain. Now you can start building and customizing your site.
How to Uninstall Your WordPress Installation
If you want to remove your WordPress site, you can do it easily with just a few clicks. Follow these steps:
1. Log in to cPanel
Log in to your hosting client area and navigate to the cPanel dashboard. Alternatively, you can use the cPanel login details sent to your registered email address to access the dashboard directly.
2. Go to WordPress Manager by Softaculous
In the cPanel dashboard, locate WordPress Manager by Softaculous. You can find it in the left menu or in the Software section by scrolling down.
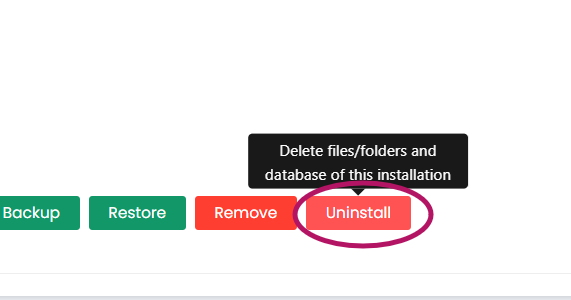
3. Select the WordPress Site to Uninstall
Find the WordPress site you want to remove. Click on the dropdown icon in front of the selected site to view more options.

4. Uninstall
Click on the Uninstall button. Softaculous will remove the WordPress installation for you.
5. Confirm Uninstallation
Confirm to remove Intallation.
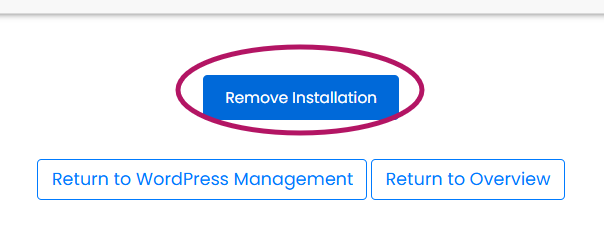
That's it! Your WordPress site will be uninstalled.
How to Copy Your Site to Another Domain in the Same cPanel
If you want to copy your existing site to another domain within the same cPanel account, you can use the Clone feature. Follow these steps:
1. Log in to cPanel
Log in to your hosting client area and navigate to the cPanel dashboard. Alternatively, you can use the cPanel login details sent to your registered email address to access the dashboard directly.
2. Add Your New Domain
Add the new domain to your cPanel as a separate domain.
3. Update Nameservers
Ensure the nameservers for your new domain are updated to point to your hosting account.
4. Open WordPress Manager by Softaculous
Navigate to the WordPress Manager by Softaculous in your cPanel dashboard.
5. Select the Site to Clone
Find the existing site you want to copy. Click on the dropdown icon in front of the site to view the options.
6. Click on the Clone Button
From the dropdown menu, click on the Clone button.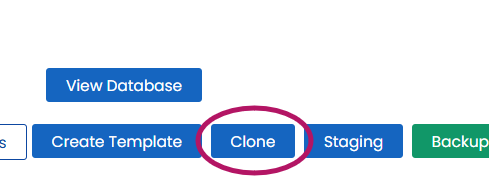
7. Select the New Domain
- Choose the new domain from the dropdown menu.
- If needed, you can also specify a simple database name for the cloned site. Or you can keep already suggest name.
8. Clone the Site
Scroll down and click on the Clone button to begin the process.
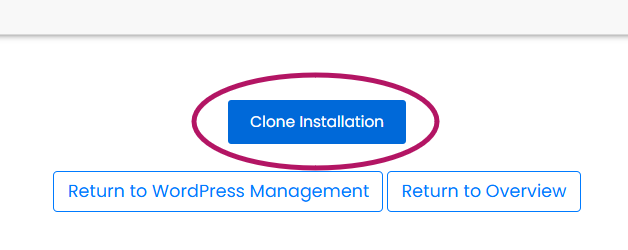
Your site will be successfully cloned to the new domain, and you can access it using the new domain name.
How to Back Up Your WordPress Site Using Softaculous
Creating a backup of your WordPress site with Softaculous is simple. Follow these steps:
1. Log in to cPanel
Access your cPanel dashboard by logging into your hosting client area or using your cPanel login details.
2. Go to WordPress Manager by Softaculous
In your cPanel dashboard, locate and open the WordPress Manager by Softaculous.
3. Select Your Domain
Find the domain of the WordPress site you want to back up. Click on the dropdown icon next to it.
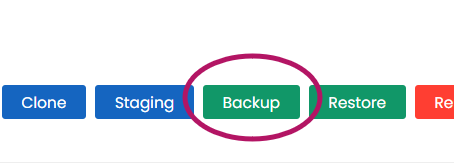
4. Click on the Backup Option
From the dropdown menu, select the Backup option to start creating a backup of your site.
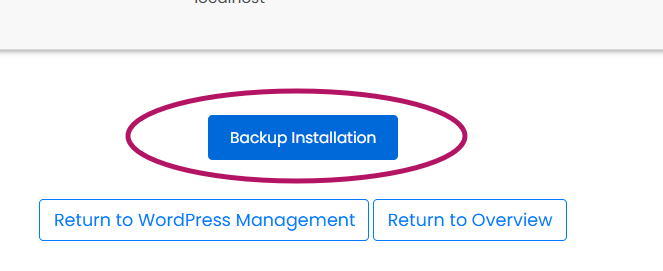
5. Scroll Down and Install the Backup
Scroll down and confirm the backup installation by clicking the appropriate button.
6. Check Backups
Once the backup is created, you can view it in the backups section. Here, you can:
- Download the backup to your local computer.
- Restore the backup if needed.
- Delete the backup if it’s no longer required.
With these steps, you’ll have a reliable backup of your WordPress site ready for any situation.